

In this post I will discuss about how to dequeue messages from Oracle Advanced Queues using Oracle SOA AQ Adapter. The intension of this post is to understand Oracle SOA AQ Adapters. But as you need a queue to be dequeued, I will discuss about how to create custom queues, and how to enqueue and dequeue message from this queue. The entire process involves dealing with multiple Oracle components like Advanced queues, AqAdapter instance on weblogic server, SOA AQ Adapters and BPEL process.
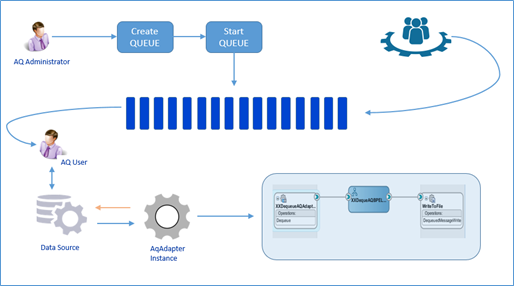
Figure 1 Overview of Oracle SOA AQ Adapter consuming AQs
-
Oracle Advanced Queues
Advanced queuing is built by oracle to serve the purpose of middleware requirements. Different applications can communicate and exchange messages using Oracle Advanced Queuing. Producer applications enqueue messages to AQs and consumer applications dequeue messages from AQs. Advanced Queuing provides database-integrated message queuing functionality and leverages functions of the Oracle database. Messages can be transmitted using Oracle Net Services, HTTP(S), and SMTP.
There are two main PLSQL packages provided by Oracle to deal with queuing. These packages are owned by SYS.
DBMS_AQADM – Used to create/delete queue table, create queue and start/stop the queue.
DBMS_AQ – Used to enqueue and dequeue the queue.
User SYSTEM has access to these packages and to create custom users. Therefore, connect to DB with SYSTEM user. If you don’t have SYSTEM access have AQ_ADMIN and AQ_USER users created by the database administrator.
CONN SYSTEM/{password} AS SYSDBA;
-
Create AQ schemas
Create a user with AQ_ADMINISTRATOR_ROLE role and grant execute access to DBMS_AQADM package.
GRANT CONNECT, RESOURCE, AQ_ADMINISTRATOR_ROLE TO xx_aq_adm identified by welcome;
GRANT EXECUTE ON DBMS_AQADM TO xx_aq_adm;
Create another user and grant execute access to DBMS_AQ
GRANT CONNECT, RESOURCE TO xx_aq_user IDENTIFIED BY welcome;
GRANT EXECUTE ON DBMS_AQ TO xx_aq_user;
-
Create & Start QUEUE
SYS.DBMS_AQADM package is used to create and start queue.
Connect with either system or xx_aq_user user and create message type in xx_aq_user schema.
CREATE type xx_aq_user.xx_request_msg_type as object
(subject VARCHAR2(30)
,body VARCHAR2(80));
Connect with either SYSTEM or xx_aq_adm user and create a QUEUE by executing below scripts.
EXECUTE DBMS_AQADM.CREATE_QUEUE_TABLE (queue_table => ‘xx_aq_user.xx_request_queue’, queue_payload_type => ‘xx_aq_user.xx_request_msg_type’);
EXECUTE DBMS_AQADM.CREATE_QUEUE (queue_name=> ‘xx_aq_user.xx_request_queue’, queue_table=>’xx_aq_user.xx_request_queue’);
EXECUTE DBMS_AQADM.START_QUEUE (queue_name => ‘xx_aq_user.xx_request_queue’);
-
Test Enqueue and Dequeue
Optionally you can test enqueue and dequeue operations. DBMS_AQ package is used to enqueue and dequeue. To test the queue, connect with either SYSTEM or xx_aq_user user and execute below PLSQL blocks.
CONN xx_aq_user/welcome;
-
Enqueue
Below PLSQL block can be used to test enque.
DECLARE
enqueue_options dbms_aq.enqueue_options_t;
message_properties dbms_aq.message_properties_t;
message_handle RAW(16);
message xx_aq_user.xx_request_msg_type;
BEGIN
message := xx_aq_user.xx_request_msg_type(‘Subject’,
‘Notification Body’);
dbms_aq.enqueue(queue_name => ‘xx_aq_user.xx_request_queue’,
enqueue_options => enqueue_options,
message_properties => message_properties,
payload => message,
msgid => message_handle);
COMMIT;
DBMS_OUTPUT.PUT_LINE(‘Successfully enqueued’);
EXCEPTION
WHEN OTHERS THEN
DBMS_OUTPUT.PUT_LINE(‘Error message is : ‘||SQLERRM);
END;
/
Query the table to verify if the message is queued into.
Select * from xx_aq_user.xx_request_queue
-
Dequeue
Below PLSQL block can be used to dequeue the queue.
DECLARE
dequeue_options dbms_aq.dequeue_options_t;
message_properties dbms_aq.message_properties_t;
message_handle RAW(16);
message xx_aq_user.xx_request_msg_type;
BEGIN
DBMS_AQ.DEQUEUE(queue_name => ‘xx_aq_user.xx_request_queue’,
dequeue_options => dequeue_options,
message_properties => message_properties,
payload => message,
msgid => message_handle);
DBMS_OUTPUT.PUT_LINE (‘Message Subject : ‘ || message.subject);
DBMS_OUTPUT.PUT_LINE (‘Message Body : ‘ || message.body);
COMMIT;
DBMS_OUTPUT.PUT_LINE(‘Successfully dequeued’);
EXCEPTION
WHEN OTHERS THEN
DBMS_OUTPUT.PUT_LINE(‘Error message is : ‘||SQLERRM);
END;
/
-
-
Weblogic Datasource
On third party/client weblogic server, create a data source and on top of the JNDI of this data source, create an AqAdapter instance. This provides access to xx_aq_user schema on local data base to third party SOA AQ Adapter application.
-
Data source
Create a data source on weblogic with schema xx_aq_user. Third party systems that need to dequeue the queue should have xx_aq_user credentials, so that the they can create AQ user data source on the third party weblogic server.
Login to weblogic console -> Services -> Data Sources – > New -> Generic Data Source

Enter values for Name and JNDI Name. Make a note of the JNDI Name, as this will be used while creating AqAdapter instance. Click Next -> Next -> Next

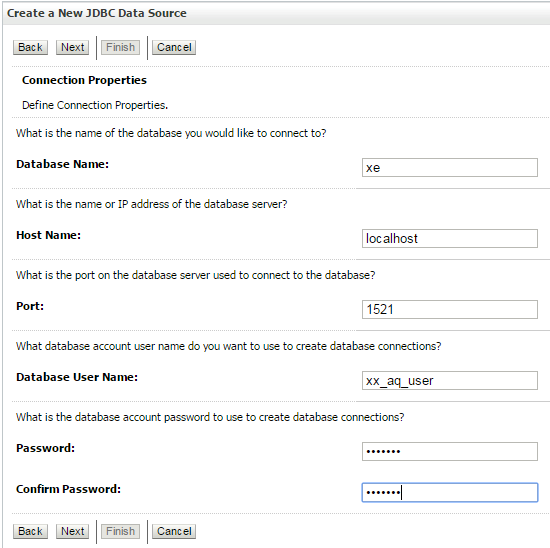
Enter database and xx_aq_user credentials. Click Next.
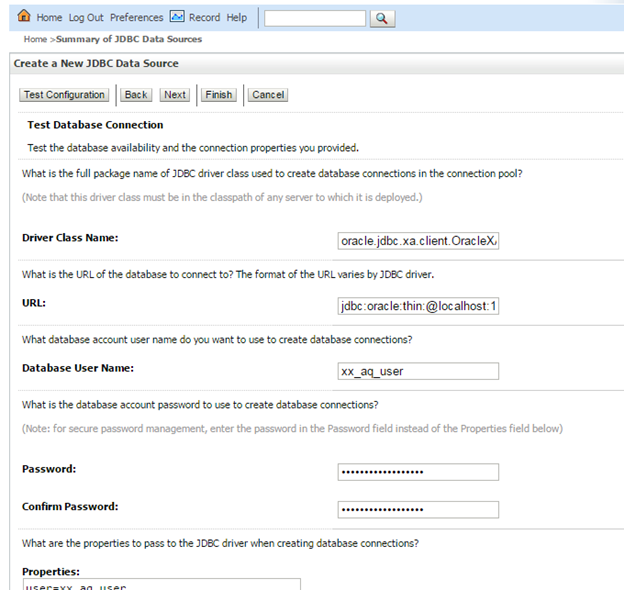
Click on Test Configuration
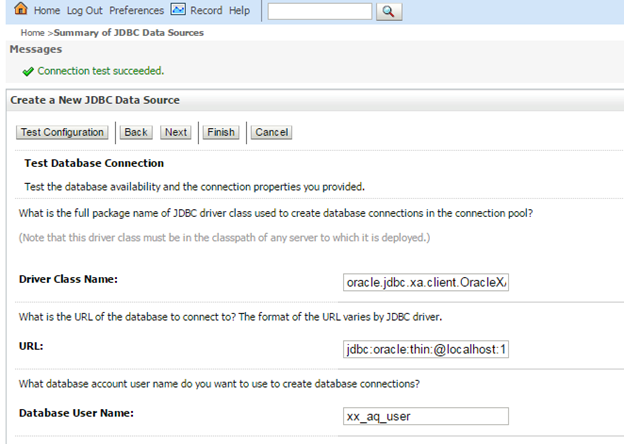
Make sure that the connection test is successful, and then click Next.
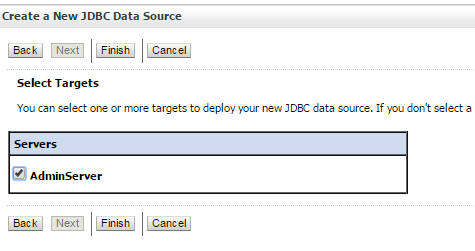
Select the server You want to deploy the data source to. Click Finish.
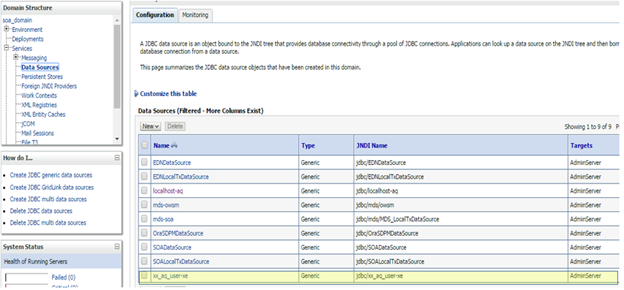
This will create a data source xx_aq_user-xe with JNDI Name jdbc/xx_aq_user-xe
-
AQ Adapter Instance.
Go to weblogic console home by clicking on Home
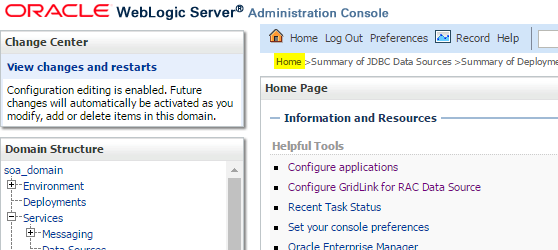
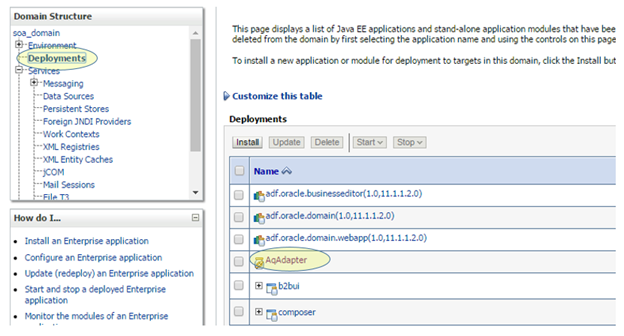
Click on Deployments -> Click on AqAdapter
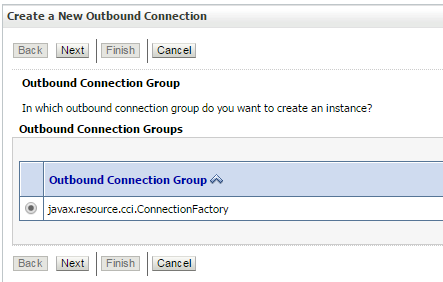
Click on Configuration -> Click on Outbound Connection Pools -> Click on New

Select the radio (javax.resource.cci.ConnectionFactory) and click Next
Provide a value for JNDI Name = eis/AQ/xx_aq_user-xe (This is user defined). Click Finish.
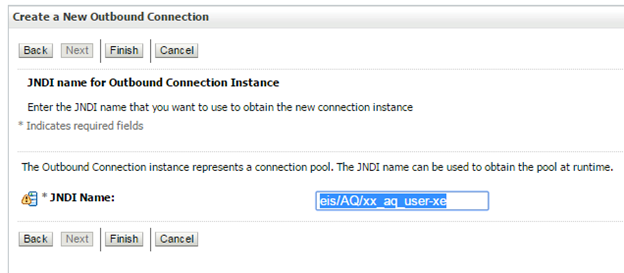
Now you have the instance created with Name eis/AQ/xx_aq_user-xe
Click on this instance.
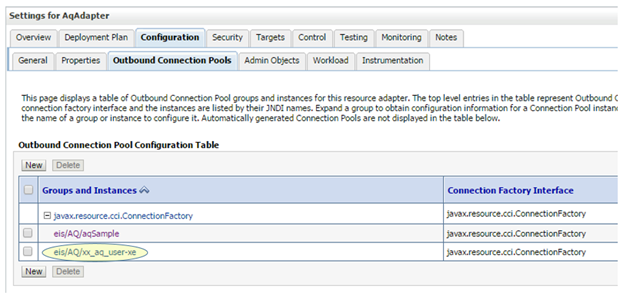
Modify the XADataSource name to the JNDI name of the data source created in previous section. Click on Save.
Note: After typeing new value for XADataSourceName, if you click outside or tabout the value will be again nullified or rolled back. The trick here is to press enter key (on keybord) after typing the value, makes the value persistance.

Restart the server on which AqAdapter is deployed. With this you have all the configurations ready for creating a SOA project with AQ Adapter that can poll the message que.
-
-
SOA Project to Poll Oracle AQ
Now its turn for the consumer (client) of AQ. Create a new SOA Project with an AQ Adapter service as exposed service, and a BPEL process, that performs business logic required by the client or third party.
Create a new SOA Application with name XXDequeueAQApp
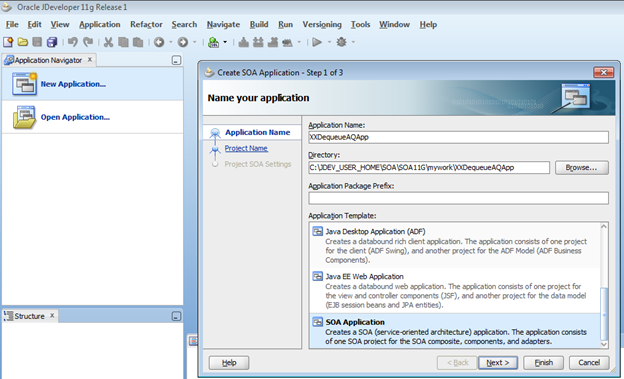
Name the project as XXDequeueAQProject
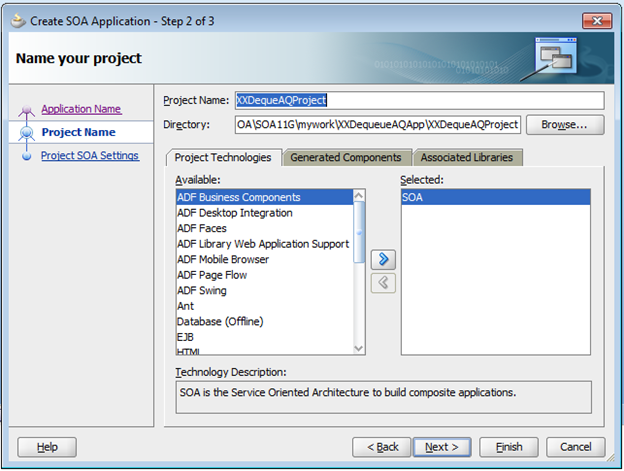
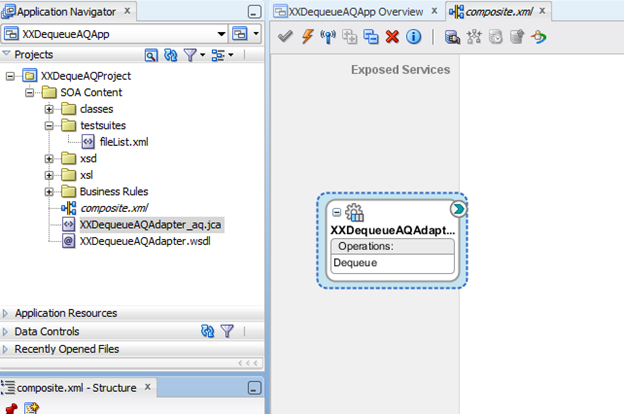
Select Empty Composite in Next window, and click Finish.T
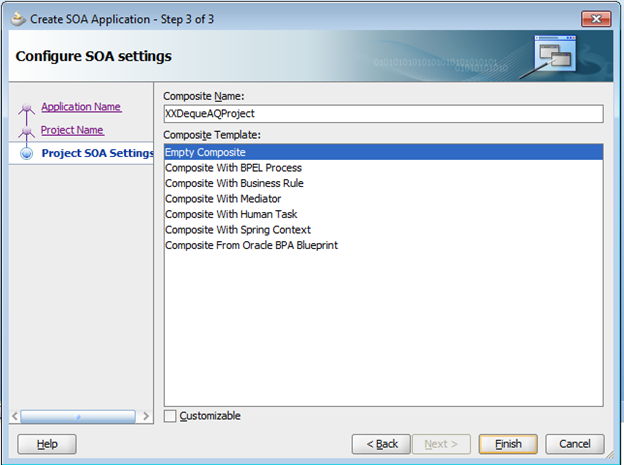
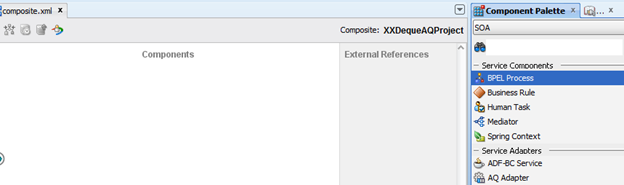
This will create an application, project and project corresponding composite.xml as shown below.
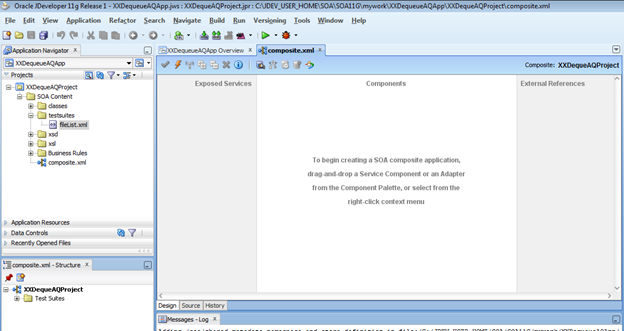
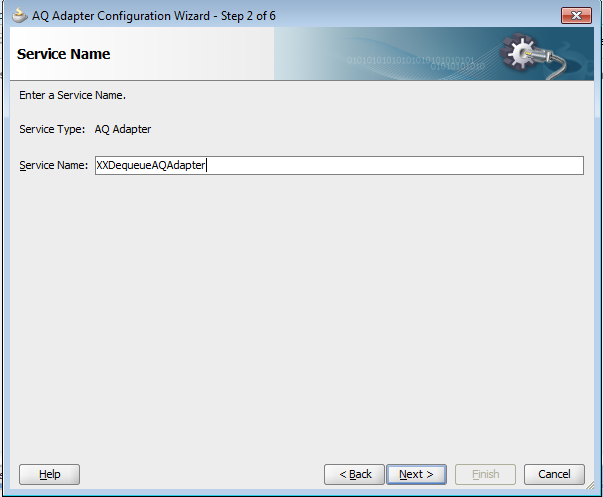
From the component palette drag and drop AQ Adapter (under Service Adapters) to External Services swim lane. This opens up AQ Adapter Configuration Wizard. Click Next on the first page. Provide a Service Name in “Service Name” page and click Next.
On Service Connection page, click on the “+” icon to create a new connection. This opens up a connection configuration wizard. Provide a connection name. It is a good practice to provide connection name similar to the tailing part (string after jdbc/ . For example if JNDI Name is jdbc/xx_aq_user-xe then this would be xx_aq_user-xe) of JNDI name while connecting the data source. Provide all the required details of xx_aq_user user credentials for the data base server. Test connection and click Ok.
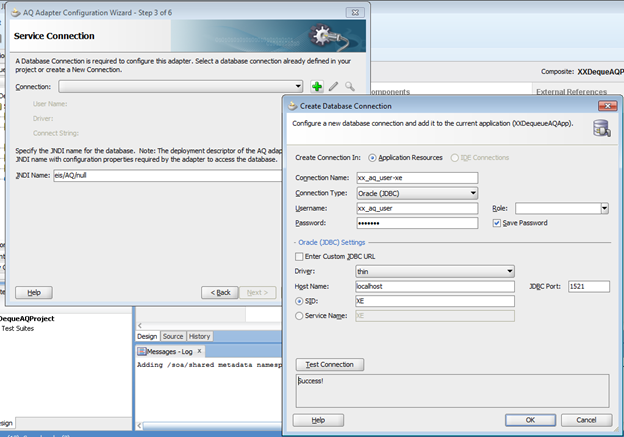
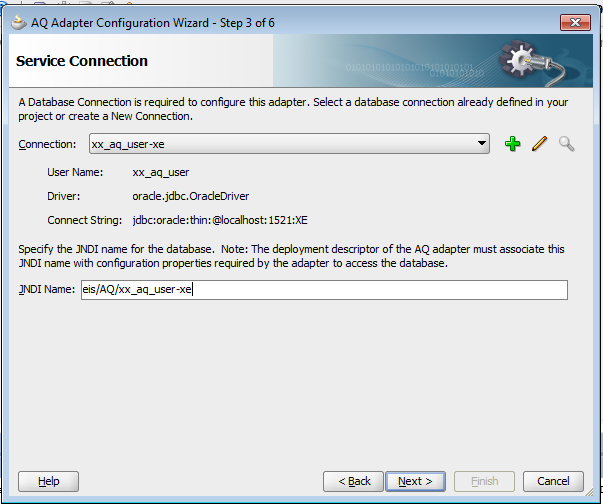
Provide the JNDI Name equal to the AqAdapter instance name (example : eis/AQ/xx_aq_user-xe)
Note: Please note that, this is not the data source JNDI name. Click Next.
On Adapter Inteface page select “Define from operation and schema (specified later)” option, and click Next.

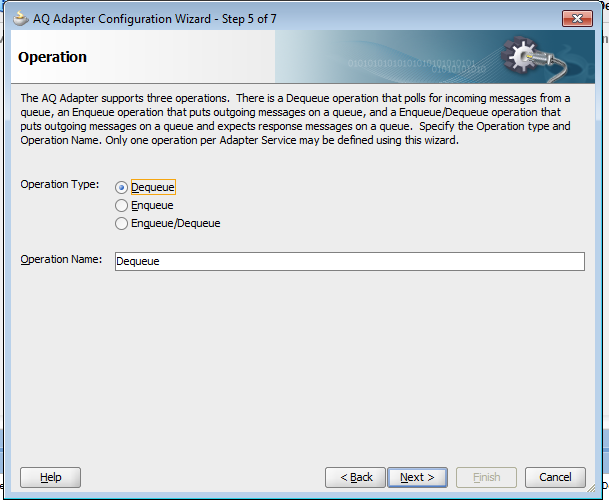
On Operation page, select Dequeue, and provide an Operation Name, then click Next.
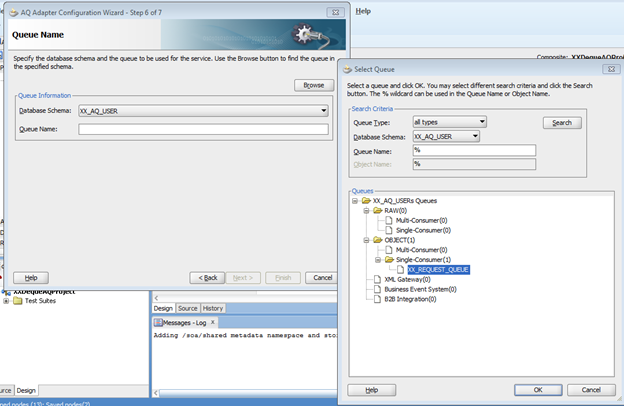
On Queue Name page, select AQ User (xx_aq_user) schema and click on browse. This will openup a popup. Select the queue name, from where you want to dequeue. Click OK. Click Next.
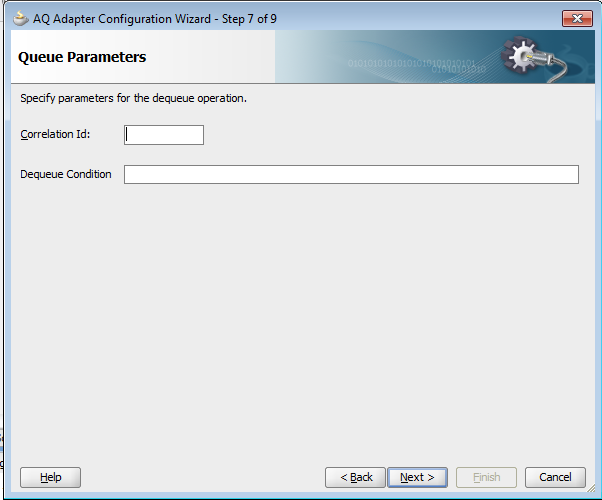
In Queue Parameters page, you can provide any dequeue conditions, or if you want to dequeue all the messages from the queue, you can leave these values blank. Click Next.
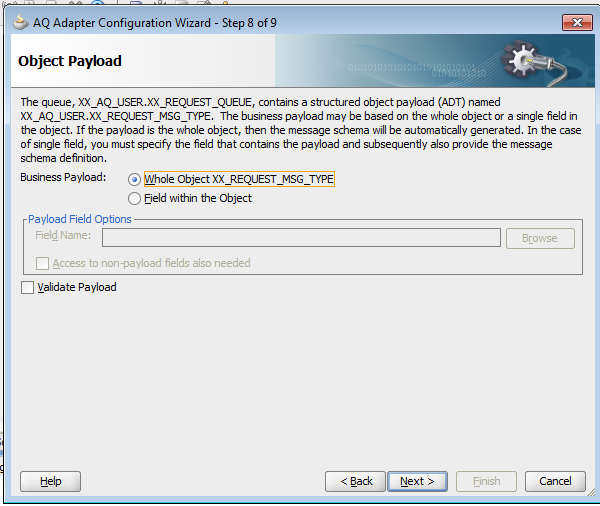
On Object Payload page, select opetion “While Object XX_REQUEST_MSG_TYPE”. Click Next and then click Finish.
Now you have the AQ Adapter exposed service ready. This service polls the queue and dequeues messages.
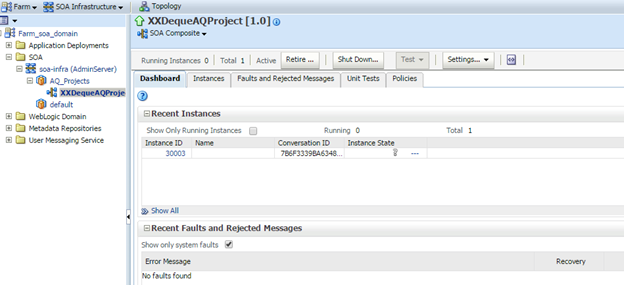
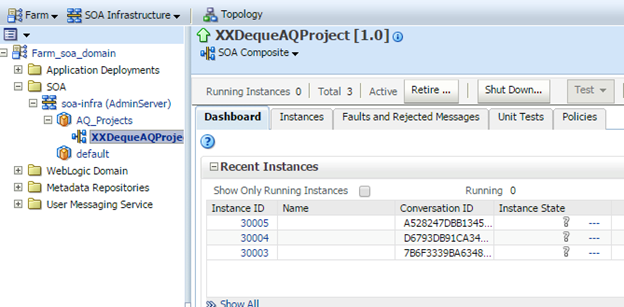
You can deploy this application to the server. After successful deployment the application starts polling the queue XX_REQUEST_MSG_QUE and dequeus the message. Login to em console to monitor the service. As shown in below figure, under dashboard each deque run is shown as an instance.
To test this application further you can insert few message using below block, and monitor the instances.
DECLARE
enqueue_options dbms_aq.enqueue_options_t;
message_properties dbms_aq.message_properties_t;
message_handle RAW(16);
message xx_aq_user.xx_request_msg_type;
BEGIN
message := xx_aq_user.xx_request_msg_type(‘Subject’,
‘Notification Body’);
dbms_aq.enqueue(queue_name => ‘xx_aq_user.xx_request_queue’,
enqueue_options => enqueue_options,
message_properties => message_properties,
payload => message,
msgid => message_handle);
COMMIT;
DBMS_OUTPUT.PUT_LINE(‘Successfully enqueued’);
EXCEPTION
WHEN OTHERS THEN
DBMS_OUTPUT.PUT_LINE(‘Error message is : ‘||SQLERRM);
END;
/
After inserting couple of messages using the above block, you can see there are additional instances in em console.
As further extension to this, we can try to append these messages to a text file. To achieve this add BPEL component and file adapter to the SOA Project.
Drag & Drop BPEL process to components swim lane.
Above action opens up Create BPEL process wizard. Provide Name, Namespace (targeNamespace for this BPEL document). Chose “Define Service Later” choice from the drop down for Tempalte. Click Ok.

A new BPEL process is added to components swim lane.

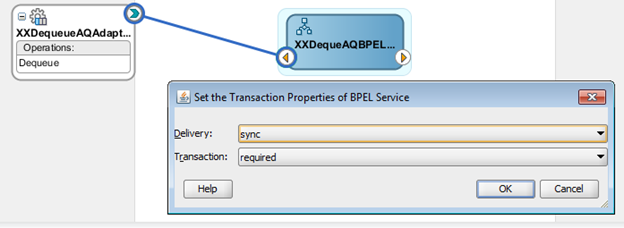
Connect a wire from Adapter service to BPEL process. Click OK on popup.
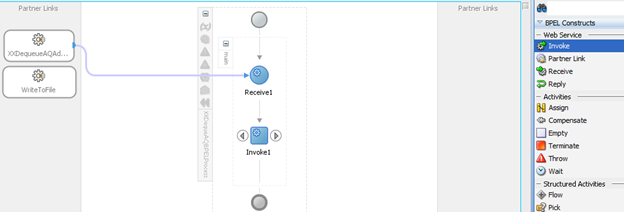
Open BPEL Process by double clicking on the BPEL Process.
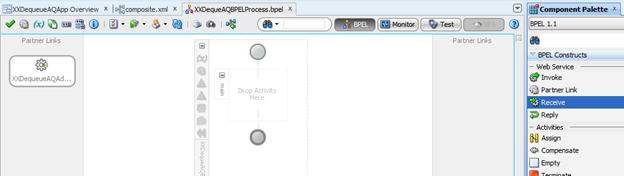
Drag and drop Receive activity from right side component palette to BPEL process.
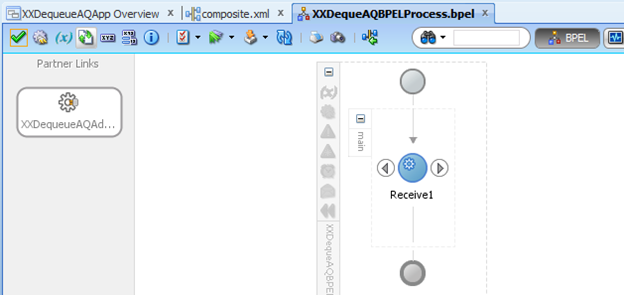
Connect the receive activity to partner link AQ Adapter. This will open Receive activity wizard. Select the checkbox Create Instance.
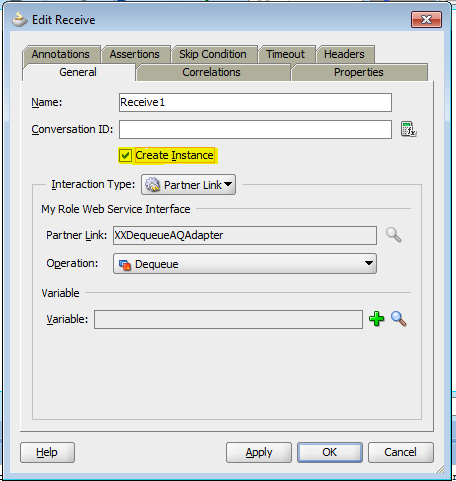
Click on + icon next to Variable to add new variable. This will open create variable wizard. Provide a value for input variable name and click ok. Click Ok on Receive activity wizard too.

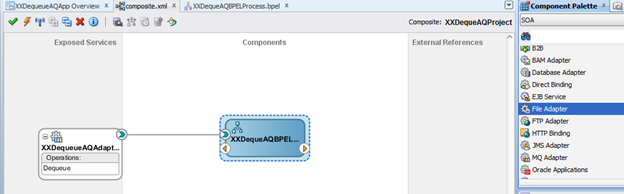
This will assign the input variables to BPEL process global variable. Next step is to write this data to a file using file adapter. Open Composite.xml and drag & drop File Adapter to External References swim lane.
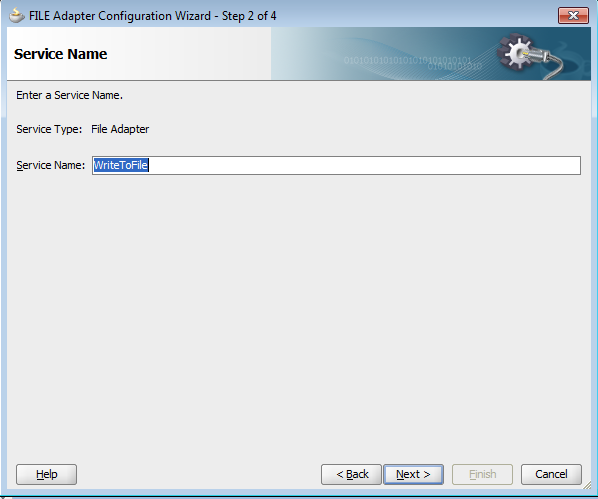
This will open up File Adapter Configuration wizard. Click Next on the first page. On Service Name page provide Service Name and click Next.
On Adapter Interface page select “Default from operation and schema (specified later)” option. Click Next.

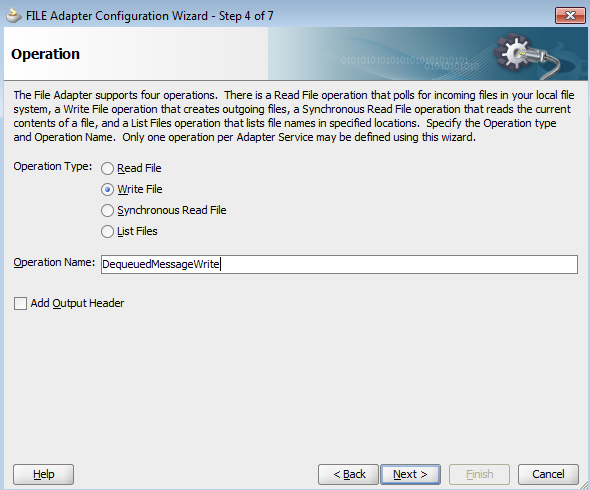
On operation page select “Write File”. Provide an Operation name and click Next.
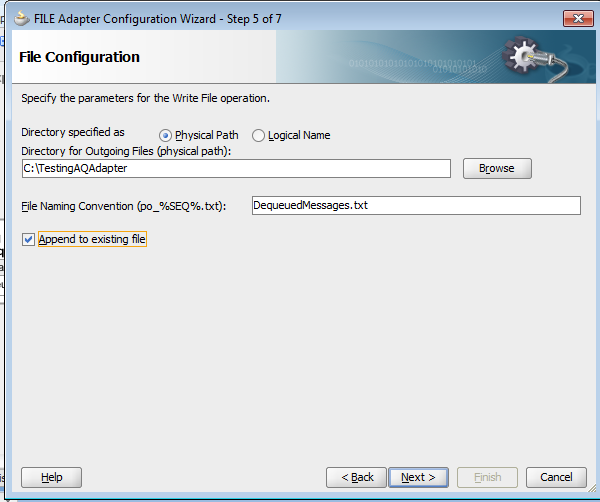
On File Configuration page provide directory path and file name. Select Append to existing file. Click Next.
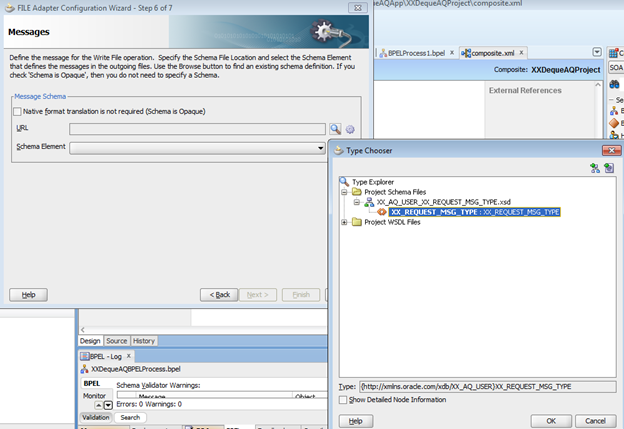
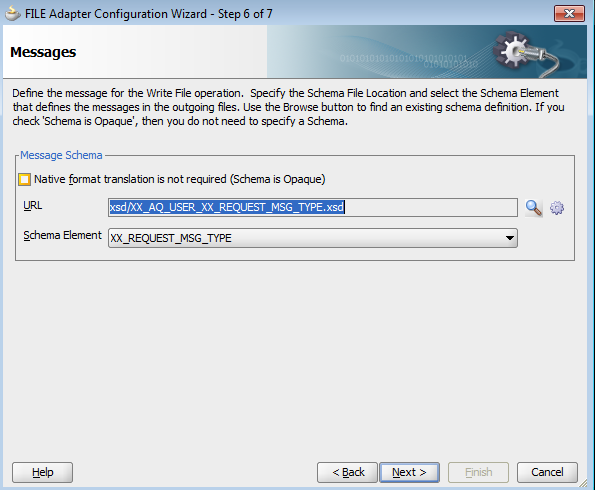
On Messages page, browse for the URL and select XX_R EQUEST_MSG_TYPE.
Click Next and then Finish.
This will create an external reference. Connect the wire from BPEL process to WriteToFile File Adapter.

Open BPEL Process by double clicking the BPEL process. Use invoke activity to push dequeued messages to the file adapter. Drag and drop invoke activty into BPEL process.
Connect Invoke activity to WriteToFile partner link. This will open Invoke activity configuration wizard.
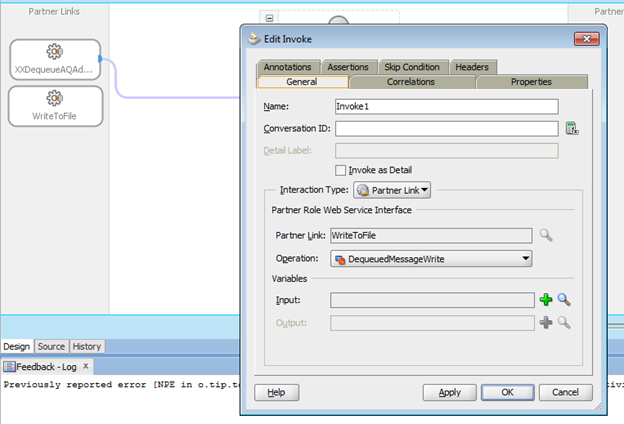
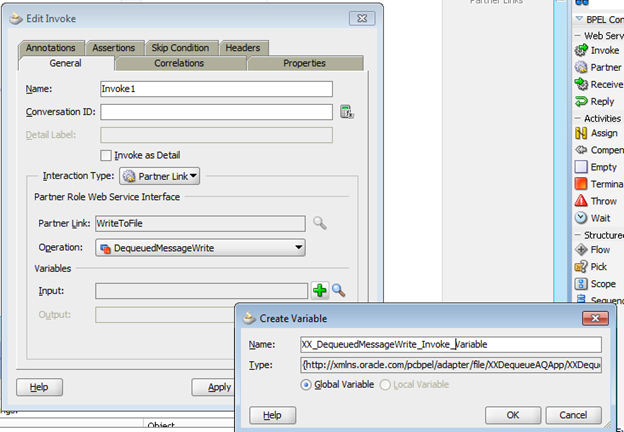
Click on the “+” icon against the Input Variable to create a new variable. Provide a value for the input variable and click OK. Click Ok on Invoke activity configuration wizard.
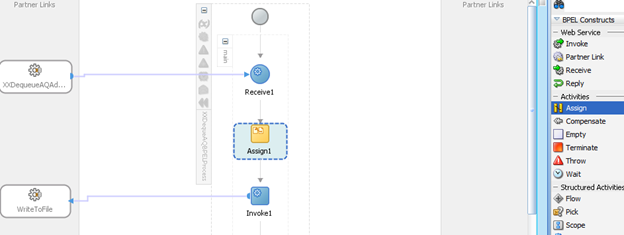
The above action will pass the input invoke activity variable to the File adapter. Now make sure that the input variable from receive activity is passed to the variable of invoke activity. This can be done by using assign activity between receive activty and invoke activity. Drag & drop Assign activity into BPEL process into the space between receive and invoke activities.
Doble click on the assign activity to open Assign activity configuration window. Assign Subject and Body values from input variables to invoke variables. Click Ok.

Deploy the application to the server. Now enqueue a message to the queue. The service runs and creates a file in destination folder as shown in below figure.

Here in this demo, I have considered writing the dequeued message to a text file. The BPEL proess can be further modified to carryout any custom operations as per the requirement.
I got what you mean,saved to fav, very decent site.
With thanks! Valuable information!
Rattling clear site, thankyou for this post.
Hello. impressive job. I did not anticipate this.
Hello. impressive job. I did not anticipate this.
here! Good luck for the next!
good stuff. I will make sure to bookmark your blog.
Awesome! Its in fact amazing paragraph, I have got much clear idea regarding from this piece
I got what you mean,saved to fav, very decent site.
With thanks! Valuable information!
With thanks! Valuable information!
At this time it appears like Expression Engine is the top blogging platform out there right now. (from what I’ve read) Is that what you’re using on your blog?
Bless you-thanks-Care to clarify some things?