

Payment approval allows management to control payments by prioritizing available funds. You can send payments to approvers for review before final payments are made to suppliers or employees. If enabled, the payment process stops at the Review Proposed Payments stage.
Approvers can then optionally remove payments directly from a payment process request and approve it.
Note: Payment approval only supports the payments created by the payment process request process. If you created them on the Create Payments page, they aren’t supported.
Setting up payment approval includes the following actions.
- Enabling payment approval
- Defining payment approval policy
- Configuring payment approval rules
Enabling Payment Approval
To enable payment approval, in the Setup and Maintenance work area, use the following:
Offering: Financials
Functional Area: Payments
Task: Manage Disbursement System Options
On the Manage Disbursement System Options page, select the Enable payment approval option.
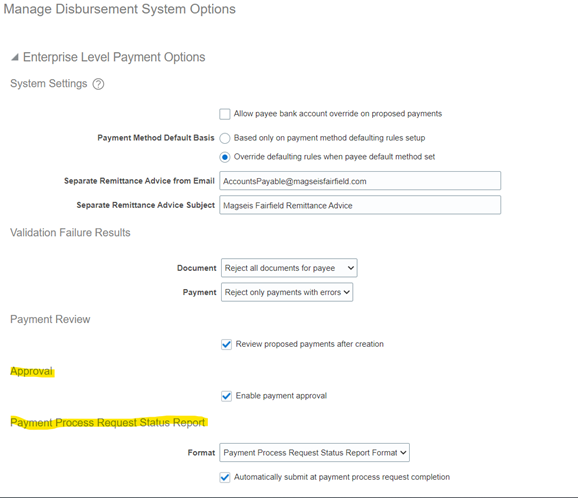
Note: Selecting Automatically submit at payment process request completion check box ensures that an approval document is created before final payment.
Defining a Payment Approval Policy
Before you can configure payment approval rules, your company must define a payment approval policy. The payment approval policy defines:
- When to initiate the payment approval process
- Criteria for triggering the payment approval process, such as bank account, or pay group
- A list of approvers who review payments and make final payment decisions
Your company’s payment approval policy:
- Determines which payments must go through the payment approval process
- Allows approvers to review payments and decide whether or not to approve the payment.
Configuring Payment Approval Rules
To configure payment approval rules, navigate to the BPM Worklist. In the Setup and Maintenance work area, use the following:
- Offering: Financials
- Task: Manage Task Configurations for Financials
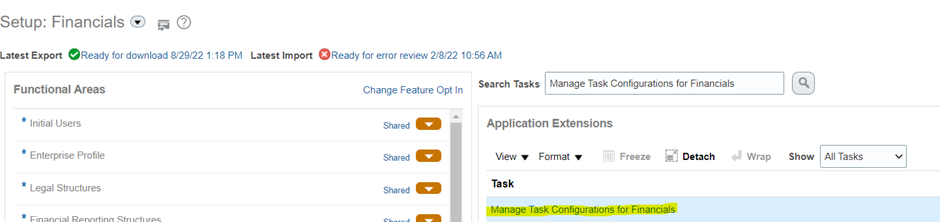
Complete these steps:
- Click the Task Configuration button.

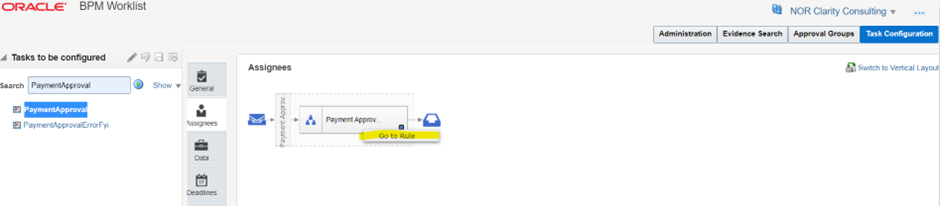
2. In the Tasks to be configured pane, click the PaymentApproval (11.1.12.0.0) task.

3. Click the Assignees tab.

4. Click the Switch to Vertical Layout link.

5. Click the diamond icon in the Payment Approval box.

6. Click Go to rule.
7. Click the Edit task icon to create the payment approval rules.
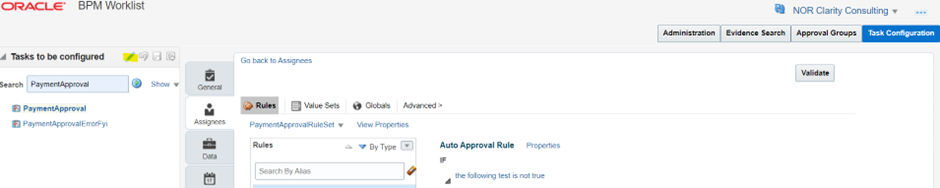
Note: Payment approval rules are configured to route payment approval notifications to approvers in sequential order only.